Tuesday, June 21, 2022

Sudden Divorce and Hasty Marriage…

For my birthday, in 2020, during the start of the pandemic, I had the chance to buy a new Royal Enfield 650INT, which was the last one on the showroom floor. RE in Texas had shut down for parts and bikes and this one happened to be Silver and available with a discount, as well. I haven’t bought a “new bike” since my 1983 Honda 750 Interceptor, so it was a big deal and a big chunk of change.


The INT 650 is a great bike with classic styling and all the features that you would want in a comfortable standard motorcycle, like ABS, Fuel Injection, Slipper Clutch, and a smooth 270-degree firing twin engine. Apart from a couple of electrical glitches and wearing out the OEM tires in 3k miles, the bike was a reliable weekend rider getting upwards of 60mpg. I made a few mods to increase comfort, like a softer seat, repositioned footpeg mounts, softer grips, luggage rack, and a little flyscreen.

It’s been the Sunday riding bike that goes out with the Jamuligans (group name) for the past 2 years and I had no plans of selling it at all.


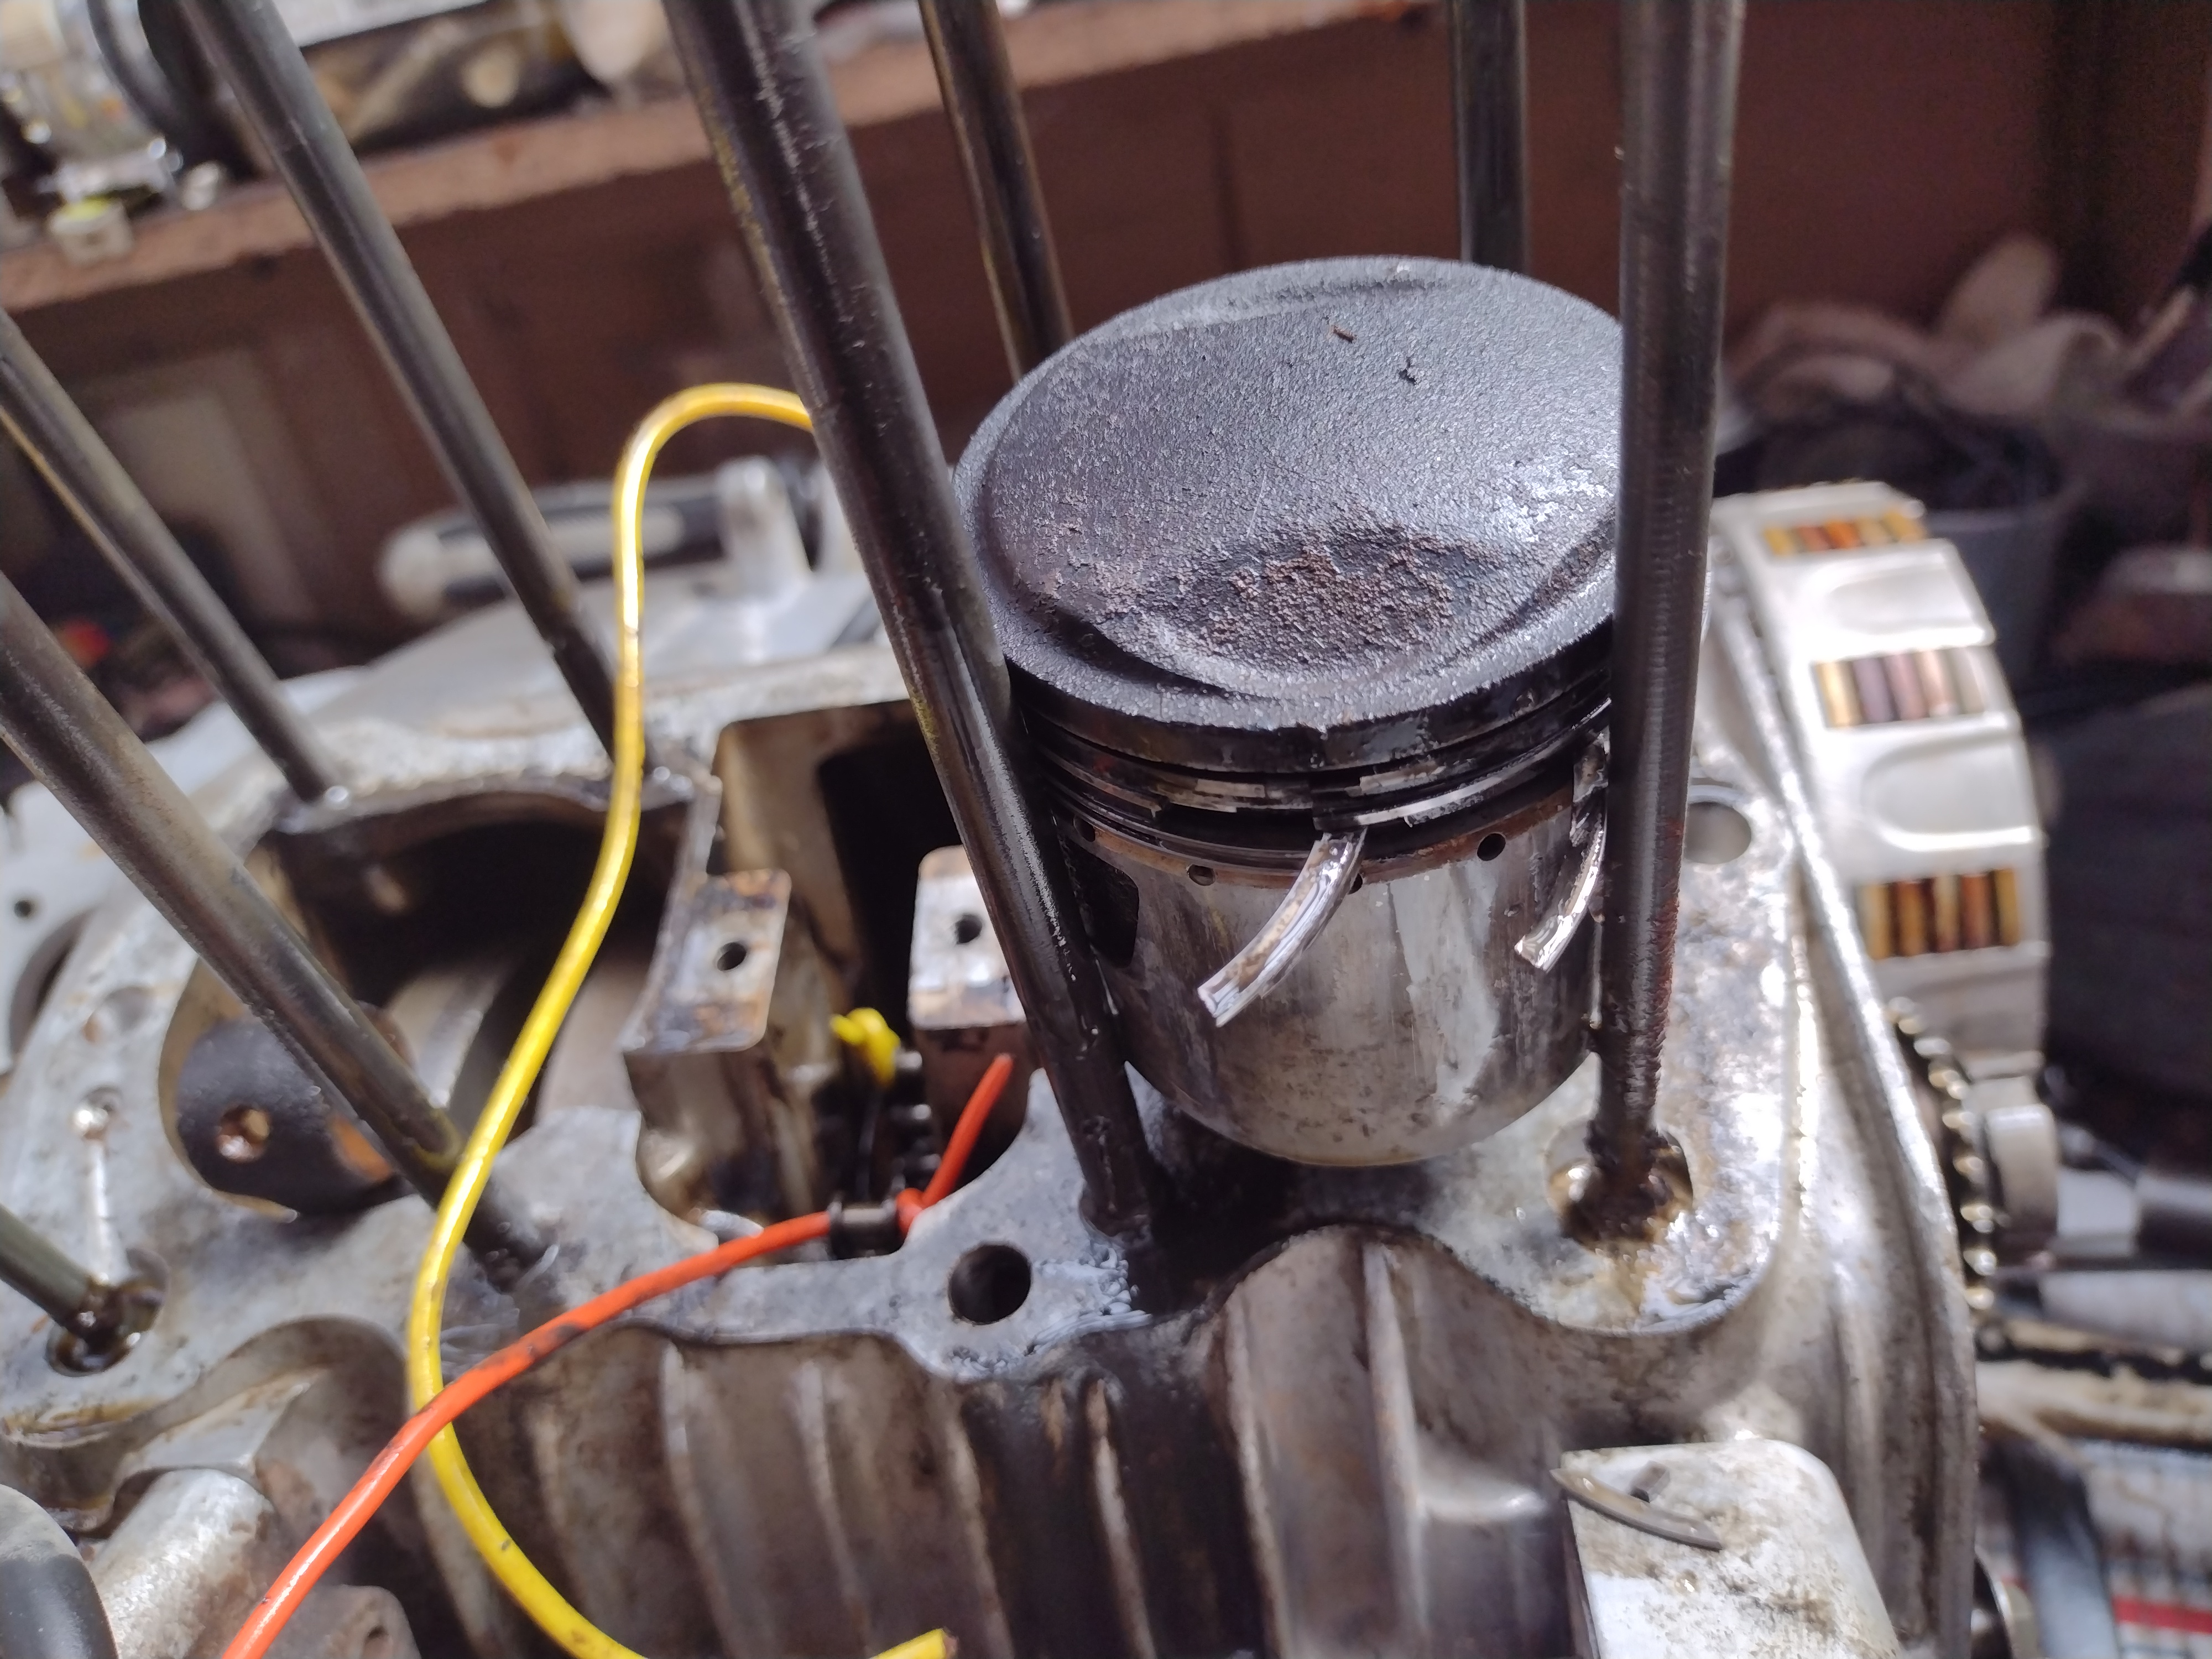
And then came a conversation with my long-time buddy, Gary, who mentioned that he was selling his 1991 NT650 Hawk GT for a great price. Oh, the dilemma! The Hawk GT only came in factory Red that last year of sales in the US and this one had 7600 original miles on it. Gary had bought it from a mutual friend back in 1994 and kept service notes on it for the last 28 years! He had it for sale a few years back and done major service work to it in order to facilitate the sale, which didn’t happen. Fast forward to 2022 and he’s ready to let it go to MrHonda for a great deal.


The bike is in stunningly wonderful condition. Fitted with a Targa 1 quarter fairing, Corbin seat and low miles on the replacement tires, it is in near showroom condition. I couldn’t resist… but it meant selling the RE 650 to make space in my limited garage area. I made the deal with Gary, then went about to get the RE onto the market.


Currently, there are very few RE 650 bikes for sale due to supply chain issues. Local dealers can only order about 4 bikes at a time and have to wait for several months to get them if they are lucky. Apparently, there are plenty of bikes built and ready to ship in India, but there are no containers to haul them out of the country and off to worldwide dealers.


I advertised the bike on Facebook Marketplace and Craigslist here in San Diego. After a few days, I received a message from a young man who lived in the SFO Bay area and wanted to come down to see/buy the bike. He had just had his FZ8 Yamaha stolen and wanted to see about buying a RE INT. Sure enough, he drove his Prius down from SFO, stopping to visit with friends along the way to San Diego. He came by and looked it over, started it up, looked at all the details of the bike and the modifications, then said “I’ll take it!”


I called Gary and told him that I was ready to bring the Hawk GT home the same day, so as the door closed on the RE, the door opened for receiving the lovely NT650. Gary had serviced a new battery for it and was having problems getting it running as he had drained the carburetors back in 2019. I mentioned that Honda’s fuel control system only allows the fuel pump to start up for a few seconds in normal operation and can’t fill empty carburetors as designed. He fed the carbs from a remote fuel tank and the bike fired right up. He verified that the fuel pump was still working properly so it was all good to go.


We did have a little snag when we went to push it out to my truck, in that the front brake caliper was dragging on the wheel. With more than a little effort, we were able to load it up into my Tacoma and haul it home. It took about 30 minutes to get the front brake caliper off and apart for a little cleaning and bleeding the system again and we were good to go.


I did get a rude surprise when I took the bike out for the local event for the Distinguished Gentleman’s Ride and the rear brake started to lock up while I was on the freeway! I managed to get it downtown just off the highway and it pretty much came to a stop all on its own. There was smoke coming from the brake pads and the little plastic cover for the rotor had melted off the bike! I used the tool kit wrench to crack the brake line fitting open which released boiling brake fluid and the brake let go of the rotor. I decided to continue to the event, just remembering to use only the front brake and the rest of the day was uneventful. Mysteriously, when I removed the brake caliper, expecting to find a bad seal ring and corrosion/contamination in the caliper, it was pretty clean inside! So, I really don’t know what happened there. I replaced the pads, flushed the system out with new brake fluid and it has been fine ever since.

I have owned several NT650 Hawks in the past, including a 600-mile original a few years ago, that needed some rehab to get it going again. They are lovely bikes, with a great sound even with OEM exhaust systems intact. I will enjoy the summer riding this little red beauty. The divorce from the RE was quick and not too painful (apart from depreciation costs), but am happily married to the Hawk GT now. Two years after the RE birthday present to myself, I give myself another birthday present with the Honda Hawk.


Bill Silver

aka MrHonda

5-22


MrHonda… still learning

Moving into my 7th decade of life on Planet Earth, I witness changes in my mind, body and daily living habits. I am generally a pretty patient person and try to be helpful wherever I am and with whoever I come into contact with on a regular basis. But I have noticed that, lately, I am a little more careless than usual and the overlooked steps result in having more do-overs than should be necessary.

Having owned and worked on dozens and dozens of 250-305s, I feel fairly confident that I can work on them successfully in most cases, but lately, there have been some unexpected challenges that had me scratching my head in wonder.

Part of any difficulties are of my own making, especially if I get in a hurry to finish up a job for myself or a customer. You get to a point in time, where you think.. “it will be okay”… or “I wonder if it will be okay” after you do a repair step. A case in point…

I have previously written about a CB77 that had such a badly-seized engine that I had to cut the cylinders in half after a lot of pounding on the pistons, just to get it apart. Once it was all torn down, I had the engine vapor blasted and cleaned carefully, then assembled the top end with a used set of cylinders on STD bore and re-used the rings, which seemed to be within specs, but had been run before. The parts seemed to be worth reusing as-is, so I put the engine together with that setup.

Once it was installed, the bike fired up, but had a persistent backfire and was fouling spark plugs with fuel and with oil. Often, when bikes have been sitting for years, the first 15-20 minutes of running will display smoke and often particles of rust or carbon blowing out the back. I gave the bike to the new owner and said to monitor it and see if it cleared up or not. Well, it didn’t and I decided that I should obtain another set of cylinders and have them bored to an oversize using the aftermarket IMD piston kits, which have nice 3-piece oil rings, and the rings are steel instead of cast iron.

The customer wanted to be a part of the exchange, so he helped me tear the engine out of the chassis and put it on the bench. Apart from the used pistons/rings causing oil smoke, the engine looked okay inside, but I double-checked the valve seating because of the still persistent backfiring when the engine was cold. No signs of compression leaks past the valves and when it was reassembled it had 180 psi on both sides. The bike sounded healthy and the customer trailered it back home, left it with an upolstery shop for a month, then brought it home. With little miles added, he had a problem with the idle speeds running fast when the engine was warmed up. So, I asked him to bring it back so I could replace the camsprocket with a rebuilt one that keeps the spark timing steady.

He dropped off the bike, I tilted the engine down to try to just change the camsprocket while the engine was still in the frame and then got a shock when I discovered that the cams and rocker arms were dry and never got oil to the top end! The bike probably ran some 30-40 miles with no oil to the camshaft and rockers! Gotta give Honda some credit for being tough under adverse conditions!

I finished pulling the engine and then tried to noodle out what was blocking oil to the top end. I pulled the clutch cover to check to see if the spring-loaded plunger was still in the end of the clutch pressure plate, which it was. I turned the engine up on end to remove the oil pump, which turned out to be okay still. The oil filter had a film of grit from the cams/rockers that had found its way down the camshaft tunnel and into the oil pump and back into the filter. I cleaned the filter and reinstalled the clutch cover. All that was left was the cylinder block and gasket. With the head off, I raised the cylinder block up an inch and saw that the correct 9-hole gasket was correctly placed. What’s left???

I pulled the cylinder block all the way off the crankcase and turned it over, only to discover that the cylinder casting was a replacement version that had the extended portion for the added oil channel hole but the cylinders were NEVER DRILLED for the oil passage. Mystery solved, but sadly this was the second time that this has happened to me in the last 10 years, where the cylinder was for the 1960-61 engine cases and the extra oil hole was not bored through. ARGGGGH!

I dismantled the cylinder head and flushed out the debris, then replaced the whole camshaft and rockers with good used parts that happened to be in supply. I laid out the location for the extra oil hole and drilled a progressive set of holes until I got it to the right size and depth to get into the oil galley. More flushing and air pressure to ensure that the chips were cleaned out of the passageways. Then a mystery appeared when I was turning the engine over with a wrench and when the left side piston was close to TDC, I could feel the piston hitting something with a thunk and then going past it. I pulled the head back off to inspect the valves and piston, but there were no clear signs of what was happening. When the head was back in place, held down with a couple of sockets, I could still feel this interference happening and actually lifting the head up slightly when the sockets were removed. ????? I decided to put an extra base gasket underneath the cylinders to raise the deck height up a bit and the interference, whatever it was, stopped happening. I still don’t know exactly what was hitting on that side...

Slowly, I reassembled the top end and refitted it back into the chassis. Reassembling the bike’s accessory parts, I had it to a point where I could start it up and see how it ran… There still was a bit of an “idle hang” and slight backfiring. When I squirted some brake cleaner at the carb flange and insulator, the engine idle changed… an air leak!

I normally always check carb flanges for warpage and file them flat so the new o-rings can help seal the intake manifold tract successfully. I removed the carb and checked the flange again with a file. There as still a slight bit of warpage and a low spot around the bottom edge between the flange bolt holes. I filed some more and reinstalled the carburetor. There was a marked improvement in the idle quality and engine sound.

When the bike was first taken away the customer commented that the left side header pipe was turning yellow due to some kind of heat issue. With the backfire going on, I kept suspecting either a leaking intake valve or carburetor internal passage issue. Once the air leak was cured the header pipe quit turning colors.

I should have noticed the correlation between the air leak and header discoloration because it happened to the white CB77 that I had acquired and serviced up. It was getting a discolored header pipe too, and when I looked more closely into the carburetors, I discovered that both insulators were blown out at the o-ring channels causing big air leaks. Replacing the insulators with new o-rings fixed that problem as well.

Had I taken just a little more time in checking ALL the parts more carefully, before installation, I could have saved myself many hours of labor and a bucket of used parts. I plan on being more diligent in the future to ensure that things are done right the first time and at a pace that is comfortable for me and my customers.

Bill Silver

aka MrHonda

www.vintagehonda.com


Tuesday, May 3, 2022

Knock, knock! Who’s there? CL160.. uh, oh...

The cast of characters:

Owner from N. Cal (600 miles away)

Bike: 1966 CL160, bought from Craigslist with unknown history

Factory photo courtesy of AHMC.

Referral: Tim McDowell (MD)

Stated problem: Won’t idle down properly.

Troubleshooter: MrHonda, Spring Valley, CA


So, I get this call from Tim saying that he referred a caller to me about a CL160 with carb problems. Okay, I don’t work on 160s as a regular thing, but how hard could it be????


The owner, named Pete, drops off the bike from the back of his pickup and wants to hang out as I try to figure out just what the issues are with his machine. All he knows is that when it starts it up, it revs to the moon and he can’t control it even with idle screws all the way out.


First, the tank and seat come off and compression checks are made. Cylinders are showing 180/165 psi. The spark plugs are fuel/oil-fouled black. The spark advancer was replaced previously, but the ignition timing is about 10 degrees retarded. Timing reset and a separate fuel bottle is hooked to the carbs. Carb bowls were already pulled off for inspection and gunky gasoline discarded. Fuel bottle connected to carbs, engine kicked over, but won’t start. Check spark and clean plugs with brake cleaner. Spark to both plugs, but still won’t start up. Check right side bowl and it is empty. Check float valve, but it is clean and we determine that the fuel bottle isn’t high enough to feed the carbs. Reposition fuel bottle and engine starts up and immediately revs to a million rpms.


We know that spark timing is okay, carbs are getting fuel and slides are now backed off enough to allow an uneven idle, but the exhaust is pumping out blue smoke worse than any Kawasaki Triple on pre-mix. Holding the idle up to medium revs to clear the exhaust system of un-burned fuel sand carbon for a few minutes doesn’t help clear the smoke. It’s obvious that pistons/rings are not doing their job and the engine will have to come out for repairs. On top of that, there is an irregular knocking noise coming from somewhere deep inside the engine.


Pete watches for a while and then heads back up to LA where he’s staying with family for a few days. Engine removal continues and once it drops onto the dolly, I wheel it back to the workshop for a quick tear-down of the top end. Nine fasteners hold the head down to the cylinders and the top cover is off. Cam and rockers all seem okay, so camchain master link is found and disconnected. I put pieces of 22 gaelectrical wire through the ends of the chain with a knot tied in one end of the wire to keep track of the camchain.


The head then comes off and I am surprised to see one shiny new piston installed in one side and a used one in the other. ????? I remove the pistons from the rods and check piston clearances and end gaps on the rings, all of which seem to be in specs. The cylinder bores are glazed and looking at each piston ring, I find that several are installed upside down, including the scraper ring which pulls oil off the cylinder walls and sheds it into the crankcase. The rings are tiny and markings barely seen without magnification aides. The top one just has a T mark, while the second one is marked with a T2 (or R2) as they are Riken ring sets. The one-piece oil ring does have a T mark as well.

I hone the cylinders, reset the rings and reassemble the engine once again. Fortunately, I had a full engine gasket kit on hand to do all of this work on the spot. My floor jack is leaking oil when I jack the engine back into the chassis, so everything is getting messy. Finally all the bolts are installed and once the carbs and exhaust are mounted up, the bike is fired up again. The engine smokes again for a few minutes but it is much reduced and begins to clear fairly quickly. I can hear the engine is running rich off-idle and had noted that Keyster kit parts were installed in the carbs. These kits are notorious for being out of tolerances for correct jetting and cause all kinds of tuning problems. Despite the engine running much better already, I drop the needles all the way down to clear the rich condition and the engine responds as desired. Still the knocking sounds continue, so the next step is to pull the clutch cover and check for something loose or broken inside.

The oil is drained and is clouded with tiny metallic specks but no big chunks so far. I removed the first drain plug I see and only a few spoonfuls of oil come out. ???? Then I remember that these engines have two drain plugs! The forward one is 19mm not 17mm and turns out to be a self-tapping plug. Lots of oil pours out of that drain plug, but is laced with metal flakes.


The clutch comes apart only after removing the crankshaft mounted oil filter outer cover, then the inner locking nut. Then one of the two off-set drive gears comes off. The clutch pack comes out as a block after the springs are removed. The clutch is stuck solidly, so obviously this engine has not run or run well for a long time. I pry the plates apart and then bend back the locking tabs on the oil pump which comes off with the clutch outer hub as the pump is driven off an eccentric on the back of the clutch outer.


The pump screen has two little support feet which are all bent backwards because someone installed the screen in reverse of normal. There is a little backlash on the clutch basket even with offset gears that are supposed to neutralize the play. The whole clutch basket has some end play that could cause some of the knocking sounds, but nothing is conclusive. With the clutch plates untangled from each other, the whole assembly is reinstalled and a new cover gasket placed in between the cover and crankcase. 1.2 liters of Honda GN4 10-30 oil fills the crankcase up to the fill mark on the dipstick and the engine is fired up again. Now the clutch is working, but the knocking sounds continue unabated. I’m running out of ideas… I go to the rotor side of the crankshaft and remove the bolt and use my 16mm rotor bolt tool to pop the rotor off the crankshaft end. I put the dyno cover back on and start the engine… same noise.

I pull the cover back off and grab the end of the crankshaft and pull/push. There is noticeable end play in the crankshaft assembly, which must be the source of the noises. As the engine is revved up into the middle ranges, the sounds subside and the engine sounds normal until you drop it back to idle again.

It is what it is, so I button it all up and install the air filters, side covers, tank and seat for a test ride down the street. About the time I am putting it back together, I look through a box of spare bits and find a container with all of the OEM carb parts, including the correct needles! Swap in the needles and the bike is running sweetly now. The idle adjustments continued to be very touchy and I swapped in a set of shorter idle speed screws, so they catch more threads to stay in place and are more adjustable.

The bike is starting with one kick and idles down normally, but one hundred yards down the street and a new noise comes to my attention. The growling sounds of the speedometer bushings are making themselves known and the needle is showing 70 mph while I am trolling along in 2nd gear at mid-throttle. One more issue to present to the owner. I suggest that either he finds a really good crankshaft, but he realizes that replacing it is a full engine tear-down that will take a good 6 hours to perform. Or maybe someone has a low-miles engine that can be swapped into the chassis instead.

While Pete was back in LA, he was following up on a CL77 bike for sale and winds up buying it. The bike has not run for many years, but is a complete 1967 Candy Orange model with chrome fenders. The serial numbers are above 68,000 so it must have been one of the last ones to come off the line.

So, guess what? Pete comes down with the CL77, drops it off, picks up the CL160 and heads back to LA, then home to N. Cal. He plans on returning in a month and in the meantime I am gathering up parts and scheduling in work to get the bike running, change the tires and make it ready to ride once again.

At the moment, I have 7 motorcycles on the property. Three CB77s which are mine, the CL77, a SS175 Harley AMF 2-stroke street bike with dead ignition, a CB500 in for carb work and oil leaks and finally my 2020 Royal Enfield, which I ride on Sundays with the Jamuligans (my buddy’s name for our little group). So, again, no good deed goes unpunished. I keep trying to clear my backlog of parts and repair jobs, but the volume is continuing to grow instead of shrinking. This is going to have to stop one of these days…


Bill Silver

aka MrHonda

www.vintagehonda.com

5/2022

Saturday, April 30, 2022

The speedometer wouldn’t lie, would it? Part 2

 With the engine installed, it was rolled back into the shop and onto the bike lift for the next phase. The rear tire was a 3.50x18” that was rubbing up against the forward edge of the rear fender, due to it being oversized and the fender had an odd dent in the edge that closed the gap even further. I had to park the bike on a 3/4” steel plate to get some wheel clearance on the rear wheel, so I could remove it and change the tire back to the normal 3.00x18” size. I had a spare spoke kit handy, so decided to dive in and clean up the rear wheel rim and hub enough to warrant a fresh set of spokes.

The task was complicated by the rear brake backing plate which had nearly new VESRAH rear brake shoes, but the brake cams and pivots for the shoes were mostly glued in place due to ancient grease used in the installation some 30 years ago. You see a lot of mistakes from people who try to do work on these bikes and don’t get it quite right. Small things like over-lubing the brake pivots and cams, and then the brake arm pinch bolt was installed backward for some reason. The over-sized tire was the other mistake which probably was a surprise when the owner tried to put it on the centerstand and found that the bike was sitting on all fours.. both tires and both legs of the stand. The bike becomes pretty unstable on anything except dead flat ground.

The swing arm had to be removed and taken to my friend Rob North for a 5 -minute welding job to reattach the front chain guard tab which are commonly broken off in higher miles bikes. The swing arm pivot bushings were rusted and pitted so were replaced along with new rubber seals on the inside of the swing arm pivots. Every part removed had to be cleaned either in solvent and/or on my grinding wheel’s wire brush side. A fresh DID drive chain was installed onto a somewhat odd set of sprockets. The front 15t sprocket was worn quite a bit, but I had a spare 16t front in my spares boxes. The rear sprocket wasn’t a stock 30, but it was an aftermarket 34t unit. Stock ratios would be 2:1 (15/30), so the 16/34 combo yielded 2.125, just a bit lower that normal. Larger diameter sprockets are easier on drive chains anyway, but I have never built up a bike with this combo before.

Considering that there was mud and gunk all the way up to the ignition coils, it appears that the bike was in some kind of flood or high water event. Much of the bike was covered in thick silt-like mud that needed to be scraped off with a screwdriver or gasket scraper. There are parts of the lower case that are still embedded with the muddy colors.

With the engine bolted up, I had the option of installing a low-cost Pro-Trigger reg/rectifier in place of the stock rectifier. The ignition system also came from Pro-Trigger, which eliminates the points, and condenser ignition system parts. Once dialed in the system kicks out strong sparks from the coils. The battery of choice for these old bikes is the Motobatt AGM battery which has clever post adapters to work on many types of electrical hookups. They provide strong amperage and steady voltage to the electrical system, for complete reliability.

All of the cables were replaced, mostly from Tim McDowell’s Classichondarestoration.com site. Tim supplied new air filters, tubes, rubber bumpers for the side covers, and other small parts that you need when you are refitting a vintage Honda.

The gas tank didn’t look too bad initially, but when I filled it up with Metal Rescue, little pinholes made themselves known all along the bottom seam of the gas tank. I temporarily patched the little leaks with dabs of GOOP and once the tank rust was mostly gone, I rinsed it out and used up the last half of my Caswell tank sealer kit. Once this stuff sets up, it is very hard and fills in small holes and adheres to any remaining clean rust areas, sealing them permanently. Good stuff!

The carburetors were not as bad as I expected, but did spend some time in the ultrasonic cleaner and got fresh gaskets and O-rings for the flanges and insulators. The chromed brass slides were worn along the top edges, but I only had a decent used one for the right side.

I had taken the rear fender off to straighten out the big dent at the bottom front edge, and poked out a few more dents in the mid-section. It’s a daily driver kind of bike with lots of patina, so I didn’t go overboard with dent removal and make it look new. I shot some Honda Cloud Silver on it before reinstalling it, taking care to clean contact areas where grounds were needed for the tail light bracket and to the frame mounts.

The front end showed signs of leaking fork seals, so they were the next to get a look and freshening up. Type 2 forks are easier to replace seals on than the Type 1 forks with chrome seal holders that are often damaged and difficult to remove and replace the seals inside. The difference on Type 2 alloy forks is that the springs are on the outside of the fork tubes, so you have to use a long bolt to thread down into the top of the fork tubes and draw the forks up into the top fork crown.

The fork seal on one side came out, after snap ring removal, with the usual slide-hammer action of drawing the fork tube up and down against the bottom of the seal until it pops out. The seal on the opposite side was having none of this kind of action. Repeated hammering on the fork case with a plastic hammer and even using the axle for a point of contact failed to release the fork seal. I tried a heat gun but had no luck either. Finally, I broke out the Mapp-Gas torch and gave it a minute of direct flame heat. It finally let go, splattering fork oil all over the floor when the fork case dropped off the end of the tube.

I cleaned the parts, reinstalled the seals, loaded them up with synthetic ATF oil from the auto parts store, and guided them back up inside the fork covers and steering stem. The last big task was the front wheel and brake panel.

Like most of the other parts on the chassis, the front brake drum was rusted in numerous places and the brake shoes were glazed and coated with dirt. De-rusting the brake drum requires a first scraping of the high rust spots with the edge of a flat-bladed screwdriver, then follows with a small stainless wire wheel chucked up in a cordless drill. A final pass with some sandpaper and brake cleaner usually results in a surface that the brake shoes can grip once again.

The brake backing plates are difficult to disassemble as the brake shoe pivot bolts are screwed into the panel then thin nuts tightened up on the outer surface, with little staked points to prevent them from loosening up on their own. A combination of 17 and 19mm sockets broke the nuts loose, allowing for the pivot bolts to be unscrewed from the brake plate. The staked edges of the bolts can damage the threaded holes on the way out if you don’t trim the edges of the bolt threads. It is a good idea to run a tap back through the holes before reinserting the bolts again. All the brake cams were gummed up and the holes in the backing plates were similarly contaminated with ancient grease installed at the factory some 60 years ago.

With the front wheel all bolted back up, it was time to fuel up the newly sealed fuel tank, install the seat, and take it for a ride. The bike started up quickly and the clutch was buttery smooth when 1st gear was selected. A first ride around the block went well, but the front end of the bike seemed to hop up and down as it gained speed. I checked the forks to see if they were working smoothly and then discovered that the ancient front CS brand tire seemed to have not been seated on the rim all the way around. I deflated it, sprayed some silicone spray around the bead and reinflated it, but the tire had some distortion beyond the bead area, so it needed to be replaced. According to the date code of 500, I assume that the tire was produced in May of 2000, some 22 years ago. Too bad because it looked like it had little wear and wasn’t cracked on the sidewalls, but there was no fixing the big hop on the tire as the wheel turned round and round.

Cosmetically, the right side muffler, which looked correct at first, turned out to be a lightweight Dixie International copy, made many years ago. There were several surface rust areas, probably due to battery acid stains on the outside. The left side muffler was an OEM original, but it had suffered some big blows to the bottom sides from some kind of impact; perhaps a rock. I searched for a cheap replacement and found that DavidSilverSpares.com had some “dented” left side mufflers for sale at a reduced price. 

These were units that were being made in the UK as replacements for the non-existent originals, but for some reason the tooling for the left sides was not correctly formed and the bump on the forward section, just behind the forward bolt mounting hole, comes in contact with the back of the clutch cover. I had seen this problem previously on the mufflers that are on my Black CB77 bike and we had to have the weld line ground down and re-welded flat to make clearance for the muffler’s contact point.

Rob North was again my go-to for welding, but he had difficulties in filling in the hole as the material was ground very thin and it was difficult to get welding rod to stick to the metal without melting it away. He spent about 15 minutes slowly closing up the hole until he succeeded in sealing it up.

So, just after a month of the purchase of a very sad, very dirty and very seized up CB77, it lives again and is ready for service once the title work gets done. For the moment, I have three CB77s in service; in Black, Blue and White.

Next step was to haul the bike and paperwork over to the DMV office for verification and getting a fresh title created. The bike was in “no record” status due to the last tags shown as 1989, so you have to start from scratch and do the steps to get it legal again with a fresh CA title. I was able to get the DMV steps started but getting a CHP inspection is currently backed up for more than a month, so the bike is in limbo now. 

Contact me at www.vintagehonda.com for details or to talk about a purchase of this or one of my other CB77s for sale. 

4/22

Bill "MrHonda" Silver


Thursday, April 21, 2022

The speedometer wouldn’t lie, would it? Part 1

Well, another ailing CB77 has found its way to my door/shop; this time a fairly rare blue 1966 edition. The lead came from the vintagehondatwins.com site, when I was assisting a different person about a 305 question. This one popped up showing a speedometer reading of 2340 miles. The brief description was that it was stored in someone’s collection for over 15 years (CA license plate shows 1992 tag) and came without a title or other paperwork.

I was able to have a conversation with the current owner who had picked it up recently from a chance encounter with a man at a cars and coffee Saturday morning event. The bike has a seized engine, but initially the seller was describing a ribbed front tire that appeared to be in excellent condition, perhaps indicating that it was an original item. While the conversation continued more details came up that cast a shadow on the “originality” of the bike and the tires. The tires were from Cheng Shen, out of Taiwan, a common replacement back in the 1980-90s. The front tire size was not correct at 3.00x18 (date code 500). The rear was a 3.50x18 which causes the bike to be unsteady on the centerstand due to the increased overall circumference of the tires.


The chain guard's forward tab on the swingarm
was broken free and the chain guard was chromed at sometime in its life. The bike is a 24xxx model, so was originally equipped with the low, flat-bar handlebar setup. The bike had 1975 Oklahoma inspection stickers on the front fork, but the CA license plate was the blue version dating back into the 1970-80s era. The fork cover has some dents and there is a dent on the top of the fuel tank, plus lots of scratches all over and the usual rust buildup in the nooks and crannies of the frame. The mufflers are OEM, but the right side has some rust patches on the outside and some battery acid damage and the left side has major dents from some kind of impact.

After some negotiations, we came to an agreement, which included meeting me about half-way down from its location in Santa Clarita, which is where the last CB77 came from. It is a 340 mile round trip from San Diego, so a meetup in Anaheim was a big help even at additional cost to offset his costs and time to drag it halfway down the road.

Initial impressions were that the bike had had it’s share of use, beyond 2300 miles, given the changed tires, broken chain guard tab and after a closer inspection one of the cylinder head nuts had been replaced with a plain hex nut, so it was looking less and less like the speedometer was the original unit that came with the bike from the factory. Still, I am a sucker for a Super Hawk, so we concluded the deal and I brought it back the last 100 miles to home again.

First order of business is to remove the engine and get it on the bench for a top end teardown and inspection to see just what has happened to it in the past 20-30 years. In the meantime, I ordered another AGM Motobatt battery and a rear tire for the bike, which will be followed by a complete set of new cables, fuel tank cleanout, petcock overhaul, carb overhaul, gasket kit and seal kit and whatever else it will need to get operational again.

Day 2

The engine was lowered down on my portable bike lift and then given a wash down to get the worst of the dirt and grease off of the outside of the engine casings. After a little scrub-up, the engine was hoisted up on the workbench. I always loosen the outside case screws on the cylinder head and clutch cover before I go to far into a teardown. Using the mass of the engine to hold things steady, my impact driver got a good workout loosening the screws, especially in the head where they appeared to be unmolested since the bike was assembled in 1966, which was noted on the factory wiring harness tag.

Based upon the wear on the sprockets and other chassis parts, it is doubtful that the bike only has the original miles that are showing on the speedometer. All the cables are beyond shot, the drive chain is worn out. The broken chain guard tab doesn’t usually happen at that low of mileage. As parts were removed, the crankshaft was checked for any signs of turning and to my surprise it did turn about one-quarter of a turn and then stopped dead. It would turn backwards for the quarter of a turn, but no more in either direction.

As luck would have it (for a change), the master link was almost right at the top of the cylinder head, giving me easy access to the clip. I string a piece of 22 gauge wire through the ends of the camchain to keep them from falling all the way down the engine cases. The top cover came away and revealed a nicely clean set of cams and rockers. Flipping the head over showed some normal carbon and a bit of corrosion on the valve heads, but nothing was bent, burned or broken. With the head removed, I tried the crankshaft again, but nothing had changed. The pistons looked okay on the crowns, but they would only move up and down a bit then tighten up solidly.

At first I thought that perhaps something was tying up the crankshaft sprocket and primary chain, but a look under the clutch cover didn’t reveal anything out of the ordinary except that the outer surface of the oil filter was showing signs of some kind of unusual rubbing marks. I setup my steering wheel puller which is generally used to push down a stuck piston with success in many cases. Despite the lack of obvious rust or seizure damage the right side piston refused to push down easily, fighting me every mm of the way. After an hour of wrestling with it, I was able to almost see the edge of the wrist pin bore at the bottom of the cylinder block sleeve, but it wasn’t giving up without a big fight. I left it for the night and plotted a new course of action for the next day.

Day 3

Well, it took another hour of pounding and twisting the steering wheel puller in order to extract the stuck piston from the cylinders. I actually wound up getting the cylinders blocked up with a 2x4” piece of wood, then working the piston down far enough to get to the wrist pin/clip. I reached into the center of the crankcase and removed the two bolts holding the camchain guide roller/bracket which left me a clear shot at pushing the pin out using a very long screwdriver. As the cylinders were pulled up, the left side piston released lots of broken bits of piston rings.

The right side piston was still stuck in the bottom of the cylinder sleeve, but it finally popped out with a few more whacks with a hammer and a big drift punch. That piston had all of the rings solidly glued into the piston ring lands. The cylinder walls were actually fairly clean, as far as rust/corrosion goes, but there were some deep grooves in one side and some other irregularities on both sides, especially at the top of the bores.


I finished tearing the rest of the engine apart, noting a burned shift fork and second gear slot. The gear dog engagement was about 10% and the gear dogs were rounded off from repeated jumping in and out of gear.

The clutch pack was a solid mass of plates and friction discs. I pried them apart but the steel plates are all very corroded from sitting pinched together for 30+ years. The clutch pushrod end was holding the steel ball in its grip as the end was an open piece of tubing instead of the normal hardened steel tip. Later comparison with a stock part, revealed that it may have been from a 160 instead of a 250-305 with the extension added to take up the shortfall.

Day 4

The engine cases were covered with a clay, dirt, grease mix that would only release when scrapped off with a screwdriver or other scraping tool. I spent more than 2 hours cleaning, rinsing, cleaning, rinsing and finally getting them reasonably dirt-free. With clean cases, the reassembly can proceed.

The crankshaft locating pins were all installed and the crankshaft assembly reinstalled with all the bearing races engaged with the pins. The main shaft got a good used 2nd gear, offset gear cotters and a new seal. The countershaft was treated to a new low gear bushing, new kickstarter pawl, spring, cap to freshen things up. Obviously, this bike and engine had been driven way more than the indicated miles on the speedometer.

The oil filter was a shocker when I removed the through shaft, instead of old oil drooling out there was a pile of dry dusty, dirty particles that had filled up the filter. I have never seen anything like it, as if there was water filtering through it for awhile. There was no other signs of water contamination inside the engine, but this filter was totally unexpected to find this kind of debris trapped inside.

Day 5

With the lower end buttoned up with a scarce NOS primary chain, I experimented with trying out a set of Barnett clutch plates that were in a pile of spares I went to work on the cylinder head. All the cam lobes and rocker arms seemed to be in great condition. The valves showed typical rounding on the intakes and intake seats, while the exhaust valves looked fine, but the seats seemed to be a bit uneven. Having some issues lately with oil leaks around the head gaskets, I have taken to using some GasketCinch to coat the gaskets and mating surfaces to prevent any more unnecessary engine pulls for unexpected oil leaks.

Day 6

With help from my neighbor, Thomas, the engine was lifted off of the bench and onto my little bike lift, used to raise up bikes without a centerstand. I have found it useful to push CB/CA engines back into their frames, plus it makes it easier to roll the engine around from the shop to the driveway where engines wind up being installed.

With a little jiggling back and forth, the engine was reunited with the chassis and the reassembly continued. I had purchased a set of “CB77” chrome header pipes from an eBay seller in Thailand, but when they arrived I had a bad feeling that they were not made properly. A test fit confirmed that the pipes may have been made for a Dream, as they were 3” longer than the CB header pipes and the bend was so tight that the outlet end was hitting the bottom of the engine cases. The seller refunded the purchase price and said to just keep the pipes.  

Thursday, January 20, 2022

The prodigal son returns home…. Honda CB250RS after 32 years and 38k miles

As soon as I clicked on the Craigslist posting for “collectible Hondas” my eyes popped wide open. The Honda CB250RS 250cc street bike, which I had imported from the UK in 1980, was staring back at me, now for sale about 8 miles from my home. I owned the bike for a couple of years, and then traded it off at the local Honda dealer for the all-new 1983 VF750F Interceptor Sports machine. I think I recall listing the bike on the Cycle Trader magazine, but by the time that a young woman contacted me about it, the deal was done. Not to be deterred, she marched up to the Honda dealer and made a deal on it with them. I’m sure they were relieved to be able to sell it so quickly, as it is really a one-of-a-kind bike in the US.

I was in England for vacation when I discovered the new CB250RS models being released over there. I contacted a dealer who offered it at a good price and instructed him to ship it to me in California, which he did gladly. In order to get it past Customs/EPA I had to sign a waiver that the bike was going to be used for racing purposes only and never be registered for the street. At the time I was in good graces with the local Honda dealer, so I gave them the paperwork and pretty soon I had a clean CA title for the bike and a license plate. I applied for a personalized plate CB250R and was granted that shortly thereafter.

The bike’s biggest adventure with me riding it was a trip to Laguna Seca for the GP races, with a side-trip to Craig Vetter’s place in central CA, where he was organizing one of his famous motorcycle economy runs. Several of the major manufactures were building streamliner bikes out of their Skunk works departments (not factory sanctioned), including Honda that year. There was a $100 prize for each class of participants and I entered with the CB250RS in the 250cc class. Before leaving for the event, I had given the bike a full tune-up, leaned out the main jet one size, geared the front sprocket up a tooth and added Mobil 1 synthetic oil to the engine. With 35 psi in the tires, I was ready to hit the highway.

I found Vetter’s place and wound up sleeping in a side-room Friday night, in preparation for the Saturday morning run up Hwy 1 to Carmel. We fueled up at a local station and had our fuel caps sealed, and then off we went. I had my sleeping bag and other travel gear strapped to the back of the seat and decided to just lay down on the fuel tank and keep the speed at 55mph for the whole run. Other than a big windy corner at Big Sur, which actually blew down one or two of the streamliner entrants, the ride was uneventful. I stopped at the final destination and topped up the tank. The calculation came out to about 91mpg! Surely, I must have won that class with those numbers, I thought. Apparently, not, however as a ratty old Kawasaki 250 street single claimed the first prize at 106mpg!

I slept out under the stars on Saturday night and watched all the racing on the Sunday schedule. About 4PM, I decided that I had better head home as I was due to work on Monday morning at 9AM. I lit out for the Highway and cranked up the throttle to about 75 mph and just held it there until I reached home about midnight. I only refueled twice on the return trip and the bike ran flawlessly. Top speed on the bike is about 90mph, where it gets a little skittish due to light weight (275lbs dry) and a short 52” wheelbase.

I was contacted a couple of times by the new owner, who wanted to know how to contact the Honda dealer in the UK to buy some spares as well as a luggage rack for the bike. The last time we had spoken, the bike had gone on a trip out to Utah and beyond with the miles racking up into the 20k range.

The CL posting included three bikes from the woman’s collection, including a 1966 CB160 and a 1967-ish CD90 in nice Scarlet red with about 3k miles showing on the speedometer. One of the series of photos showed the speedometer/tachometer gauges of the CB250RS… at 42,000+ miles! I contacted the seller, who turned out to be the brother-in-law of the owner who had put all the bikes in storage about 10 years previously. The posting information stated that none of the bikes ran and all had been in deep storage for a decade. After a couple of emails and phone call, I choked down my morning oatmeal and hit the freeway for the quick 15 minute drive to see the bikes. I was warned that someone was headed in from Orange County, so I hope to be there first to have a look at all the bikes. As it turns out, I was the first one there and checked them all over briefly. The CB160 was a complete bike with some pitting on the chrome and some 11k miles showing on the speedometer. The little CD90 was cute, but rather boxy and utilitarian rather than a fun little speedster like its S90 cousins.

I focused on the CB250RS when the out of town visitor made his assessment and an offer on the other two machines. Once they made their deal, the seller turned back to me to confirm our previous negotiated price and I left to go get cash and a pickup truck. After more than 30 years, my little baby CB250RS was coming back home again and I was a happy guy!

Check back for status updates on the bike, as it is resuscitated and rejuvenated back into a running machine after a 10 year sleep.

Bill “MrHonda” Silver


…………………………………………………………………………………………………………………

CB250RS Repairs and Resuscitation Progress

I had the seller’s help in loading the bike into the 1995 Ford F150, but I was worried about the unloading part of the adventure because the bike had NO FRONT BRAKES due to hydraulic failure of the master cylinder. Fortunately, a visiting ATT technician “volunteered” to help me guide it back off the truck without harm to the bike or myself. Once it was on the centerstand, the focus was to get the brakes fixed first. The hefty master cylinder unbolted with a couple of clamp bolts and loosening the banjo fitting on the back of the unit. It had been drooling brake fluid out past the piston seals and dust boot for quite awhile, so all of the brake fluid deposits were mostly hardened and gooey in spots. Some brake cleaner spray in strategic locations, plus my HONDA snap ring pliers combined to remove the piston snap ring to empty out the master cylinder of all the old gummy parts. There was a spare 377 code master cylinder kit in the spares box and it appeared that much of it would fit in this model specific master cylinder. The piston was reused, but the new pressure cups were a perfect match and installed once the bore and body were cleaned thoroughly.

Once the master cylinder was primed again, the unit was reinstalled on the handlebars so that the newly resealed part could do the next task, which was to push the front brake caliper piston out of the caliper bore. Fortunately, this went pretty well, but the caliper seal ring and the piston had some superficial damage due to moisture corrosion from sitting for such a long time. Eventually, the piston was extracted and cleaned. The seal ring was carefully cleaned and inspected for any serious damage. Once the caliper bore and seal ring grooves were cleaned, the old parts were reinstalled. The caliper was remounted on the front fork mount and it bled air out quickly. So, after about an hour’s worth of work, the brake finally had a solid front brake system again.

From there, the seat/tail piece was removed, then the fuel tank taken off and placed aside while the carburetor was loosened up for removal. Once the cables and clamps were all dealt with, the carburetor body came free and was disassembled for inspection and cleaning. The inside of the float bowl was remarkably clean, with just a bit of varnish down in the deepest recesses of the bowl. The pressed-in pilot jet was dislodged, cleaned and reinstalled. The 32mm carburetor has an accelerator pump system installed, with a very long pump diaphragm rod used to contact the carburetor linkage. There were some signs of rust/corrosion from old trapped gas/moisture atop the diaphragm retainer, but it seemed to clean up and should be fully useable once again.

The foam air filter sleeve disintegrated as soon as I touched it, so the whole filter assembly was directed to the trash can, where the remaining filter foam was peeled off and discarded. The filter part number has a -471-code (CB250RS), however checking the part number revealed that the CM250 street bike uses the same part, here in the US. A LOT of the parts on this bike are model specific and a search of eBay auctions all led to UK or Australian sites for any loose parts offered for sale.

The last set of tires installed were a size or two too large, so some smaller rubber is in order to make the bike handle like it did originally. Standard tire sizes are equivalent to 3.00x18 front and 3.50x18 rear, which mount on factory alloy rims.

Although the bike is loosely based upon the XL250 Enduro model, the engine has a larger carburetor, more aggressive camshaft timing and a 9.2:1 compression piston installed. The 5-speed transmission gearing is also more street-biased. The fairing is a Hondaline accessory part, as is the rear luggage rack. Both mufflers have some little skid marks on the outer rear edges, but whatever crashes may have occurred in its life must have been fairly minor.

Numerous receipts came with the bike, showing lots of oil changes, tire changes, chain and sprocket replacements and other minor work. A concern for me was to take a look at the balancer chain tensioner adjustment, which must be done manually. The balancer adjuster is beneath the clutch cover, so that requires draining the oil and removal of the cover and de-compression cables. The adjustment for the balancers is a slotted plate, which is spring loaded. Releasing the locking nut allows the spring to pull the plate across the slotted section until it comes to a stop. After the first couple of adjustments, the balancer chains continue to stretch to the point where the adjustment slot runs out of room. The balancer weight and snap rings must be removed and the adjuster plate relocated on large shaft spines one notch. This puts the adjuster back into a range where future adjustments will continue to be allowed with just a loosening of the locking nut. Fortunately, because the engine is based upon the XL250 design, the engine side cover gaskets and cover seals are still available from Honda dealers.

When I owned the bike, I think other oncoming riders thought it was a Kawasaki 550GPZ, at first glance, due to the dual exhaust pipes feeding into dual mufflers, plus the overall sleek 80’s styling was consistent with other manufacturer’s offerings at the time. The squared off headlights were used extensively in the 1980s by most manufacturers. The headlight bulb is replaceable in this model, but the bulbs may be difficult to source these days. A search for the headlight bulb turned up two new ones in Australia which were $30 each, but shipping was $40! The replacement battery is a YB9-B model, which is fairly common in the US. The petcock is the same as the CM400C models, but cost about $75 each. The petcock lever plate is riveted onto the body, so the inside 4 hole gaskets cannot be replaced without some fancy drilling, tapping and installing new, tiny 3mm metric screws.

With some fresh parts in hand, work continued on completion of the carburetor cleaning and reinstallation. There was about a gallon of fuel in the tank, which was drained out to check the petcock screen condition. Amazingly, the fuel was clear and the tank was clean inside after all those years of storage. Although a new petcock was ordered, the old one was reinstalled as was the old gasoline! The rear wheel was off the bike receiving a replacement 3.50x18 Dunlop K-70 rear tire, taken from a recent CB77 acquisition (way too big for a Super Hawk anyway). The wheel was taken to the local Honda dealer, Southbay Motorsports, which has a tire machine that can remove the old, hardened tire and install a new one without scratching up the 1.85x18 DID alloy rim.

So, with a new battery installed and just one wheel on the bike, the fuel tank was mounted up with a new piece of fuel line and the reconditioned 32mm carburetor fed some 10 year old gasoline for the first time in 10 years! The carburetors have an accelerator pump, which gives a nice squirt of fuel to the intake system. With full choke and a couple of firm kicks, the motor fired right up, sounding none the worse for wear after 42k miles and 10 years of storage! Initially it ran for about 45 seconds, then quit suddenly, which can be a scary event in the event of some kind of catastrophic engine failure, but it turned out that the petcock was in the ON position and there wasn’t enough fuel to feed it until RESERVE was selected. Warming the engine up for 3-4 minutes, the only signs of some aging was a little blue smoke out the mufflers, when the throttle was twisted vigorously. The smoke continued to diminish as the warm-up continued. The old spark plug was a D9EA, which is one range cold for normal use, but fine for continued highway touring. Eventually, the plug fouled over and was replaced with a DR8EA. The old plug came out dry, without signs of excessive oil consumption. So far, so good!

With the rear wheel retrieved and reinstalled, the bike was nearly ready for its first test drive in at least 13 years (last registration tags on the license plate are 2001). It only lasted about 100 feet… I had forgotten to put the petcock back onto RESERVE again! Once it re-fired again, the first stop was the local gas station for a few gallons of fresh premium fuel to mix down the very old gasoline remaining in the fuel tank. With 2.5 gallons of gas, the bike was headed out on its first maiden voyage with the original owner back onboard again. The engine pulls well from moderate engine speeds and the transmission gears are evenly spaced, but shifting is a little bit notchy. With healthy front brakes, strong rear brakes and an engine that purrs, the reunion was a success, rekindling fond memories of my long-lost imported CB250RS Honda and the ride up the California coast over 30 years ago.

A new front tire and tube are on order and will be scheduled for replacement at the earliest possible moment. The new air filter sleeve is installed and a NOS tachometer is coming in from the UK, a recent find on eBay auctions. A trip to DMV will be in the offing, along with signed release of the CB250R license plate, so all the registration, personalized plate and title paperwork will finally be current and in my name. Recently, I had been eyeing a used CBR250R bike as a small, light runaround bike, but most are in the $2500-3500 bracket. With fuel injection and all the modern conveniences, the new 250s achieve some 70+mpg mileage figures, which can certainly save some $$ these days. It will be interesting to see if my 90 mpg figures at the economy run will fall very far down with modern gas, with this machine still being fueled by a conventional 32mm carburetor. If it proves to be reliable and fun, with good mileage, the CB250RS may stay in the stable for awhile, this summer. It’s nice to have my old friend back again.

Bill “MrHonda” Silver


Favor for a friend…

Last November, I received an email message from the wife of a former co-worker when we worked together at a Honda motorcycle dealership back in the 1980s. It started out like this:


Hi Bill,
I am hoping you are the Bill that knew XXXXXX If you remember him, please email me back. I have some info to share. I also have a M/C to ask you about.
Thank you,

XXXXX


Well, I’m probably not the only one who has received similar messages from the spouses of friends, family and co-workers who have passed away in recent years. In a following conversation, I discussed my relationship with her husband in the past and that we had lost touch for some 40 years, but I always thought very highly of him. Her dilemma was that he had left two bikes behind; a 1975 CB750F Super Sport and a 1986 Honda CB700SC. The CB750 was a full tear-down and restoration with a few modified touches done back in the 1980s. The CB700SC was a “Covid project” bike that had been sitting for awhile. It’s still a mystery as how she knew my name and how to reach me, but we called it divine intervention and left it at that.


Supposedly the bikes had been run regularly and ridden enough to keep everything functional, but when I got to them in early Jan 2022, they were not ready to ride or sell. The CB750 was in her garage and when I started it up, the bike coughed and barely ran with a full choke. Pushing it across the garage floor felt very heavy, denoting a lack of air in the tires. We rounded up an air compressor and pumped the tires up from 10 psi up to the mid-30s, which gave the bike a much lighter feel right away. It still really didn’t run much better after 10 minutes of idling and a brief run around the neighborhood, but I could see that an enormous amount of work and care had gone into the rebuild of the bike, so it was just a matter of a carb clean and tune-up to get it going again.


Rather than haul both bikes out, plus numerous boxes of spare parts, we settled on me just taking the CB750 home first along with its box of extras and see what could be done with it to make it marketable in the near future. It was an hour and a half drive up to the Inland Empire where they had purchased a home in a golf resort and I mused about what I had gotten myself into in this quest to help a friend’s family with finding a good home for the bike.


When we first talked at the end of 2021, their daughters were dead set against their mom making any sudden decisions about disposition of the bikes because they knew how much they meant to their dad. I backed off and told her that I was available whenever they were ready to make some changes in the situation. Two months later, the dust had settled, grief had passed somewhat and they agreed to start letting go of the bikes.


CB750K series bikes (4 muffler versions) have risen in prices greatly in the past few years. For the CB750 F Super Sports, the market hasn’t been so enthusiastic although the basic motorcycles are both based upon the same engine design. The 1975 models were the first generations of the Super Sport line-up with the 4into1 exhaust systems, which included the CB400F and CB550F Super Sports editions. The first generation 750s still had wire spoke wheels, but featured a rear disc brake and a more racy style than the K model bikes. The 1975-76 bikes were pretty much the same, but the model got a major revamp for the last two years (1977-78) of the SOHC 750 Four which came with Comstar wheels, blacked-out motor finish and more aggressive cams, canted valves and higher compression engines.


With some assistance on both the loading and unloading ends of the trip, I was able to get the big 750 down to earth from my Tacoma’s bed, ready for some evaluation of the running problems. I was able to access one of the pilot jets in a carburetor and it was plugged up, so I had to assume that the rest of the carbs would need attention. Fortunately, removal of the air box and carbs is a lot easier than the later DOHC models, so the carbs were out and on the workbench pretty quickly.


Popping the bowls off revealed little in the way of varnish or major contamination, apart from the plugged idle jets. What was more evident was the amount of old dried up varnish deposits on the bottoms of the carb throats both on the inlet and outlet sides of the bodies. A little Dremel sized brass tipped brush in a drill motor swept away the varnish deposits and a quick squirt of brake cleaner washed away the evidence for the most part.


The jets were slightly over-sized to compensate for the Kerker branded 4into1 exhaust system, which is about 20 pounds lighter than the OEM system that had a large cigar-shaped muffler attached at the back. Aftermarket systems generally need a bit of enrichening to help keep the air/fuel ratios in balance after some of the back-pressure was released. I rechecked the float levels and buttoned the carb rack back up for re-installation on the bike. Running a separate remote fuel tank to feed the carbs, I noticed an improvement in starting and running as it warmed up, but there was still some irregularities in the sound of the engine’s exhaust note.


Checking the spark timing with a dynamic timing light, I noticed that the 1-4 cylinders were working well but the 2-3 coils were firing erratically. Misfiring problems like this are caused by a number of factors including dirty point contact faces, weak condensers, loose coil wire connections on the primary side and problems with the spark plug caps or the coils themselves.


Removing all the spark plugs gave me a chance to check the compression readings, look at the spark plugs and check the spark plug caps for resistance values out of the 5k ohm range. When I unscrewed the spark plug caps, the one for the number three cylinder was kind of glued onto the wire. As I pulled and twisted it finally came off, but there was a big buildup of burned rubber and plastic from an arcing plug wire that was not making good contact with the inside of the plug cap. That spark plug was dark and fuel-fouling, but I also noticed that that plug was a D7ES instead of the correct D8ES series. I can only guess that the plug was fouling and replaced by a hotter one to lessen the effect. A fresh set of correct NGK plugs, all plug caps testing in around 5k ohms and tightly connected to the plug wires which were cut back a little to access new wire made all the difference in the way the bike idled and took throttle. The timing light stayed steady under increased rpms, so that was the whole issue with the engine performance… a poorly connected plug cap.


Out for a Sunday ride…


Once I had confidence in the bike, after a couple of local test rides, I decided to give it a full test on Sunday with my Jamuligan friends to run up to the mountains for our breakfast run. The bike ran fine and I even ran it up to around 90 mph indicated with no ill-effects. The only problem for the ride was when I was stopping in my driveway and put the side-stand down. Or I thought I had put it down.. As I started to dismount from the bike I realized that the side-stand hadn’t come all the way forward and was folding back up as the bike tipped over towards the ground. My reactions were to plant my left foot firmly on the ground and lift the bike back upwards to reset the stand again. Something in my left leg went POP and I got all light-headed like I was going into shock! I was able to deploy the stand and set the bike down on it properly, but then had to just stand there for a couple of minutes while my body could recover enough to allow me to move away from the bike and remove my helmet and gloves. I limped back into the house and collapsed in a living room chair. The last time something went POP in my body, I had severely sprained my right ankle and it took me out for a couple of weeks.


Fortunately, the damage wasn’t as bad as the one in the past but I iced it and have been treating it with whatever I had available to reduce swelling and pain. I was able to walk around with some pain present, but as the leg warmed up and the muscles lengthened again, I could manage okay, but carefully. I’m sure my friend would have appreciated the fact that I saved the bike from a rollover and certain damage from hitting the concrete.


So, that was the last big ride experience for me and the CB750F. It was listed on FB marketplace, Craigslist and eBay for sale hopefully to find an appreciative new owner who understands the work that went into rebuilding the bike back from scratch. If I didn’t already own a 2020 Royal Enfield 650, I would have bought it to keep for myself. It’s really a nice example of Honda’s mid-1970s efforts for the CB750 Four.

Moments like this cause us to reflect on our own mortality and wonder who will step in to take care of our parts, bikes and unfinished projects when we depart planet earth. Plan ahead if you can...


Bill Silver

aka MrHonda

01-22